Move prepositions at the end of line
 I still encounter problems when typing texts in Word and sometimes comes preposition or conjunctions at the end of the line. If you care about that it should not be at the end of the line, it must moved to the next line, but not with several spaces or by Enter! How to do it correctly, without new paragraphs, you will read in this article. If this guide has helped you, become a fan on Facebook and recommend this site to your friends, it can be useful for them too.
Prepositions should definitely not be displayed at the end of lines. Always must be connected with the following word. In order to move preposition together with the following word, we must move it from the end of the line. Many people mistakenly believe that they will achieve that by repeatedly pressing space, tab, or even enter. But beware, eg. Enter will end a paragraph and starts a new paragraph. It would thus completely separate piece of text and in future revisions just would make mischief.
Shortcuts described below work in all versions of Word and even in some other Office applications. Other commands and icons described below works for version 2007 and newer.
- If the text is in final form, and we will not modify its format in the future such as font type or size, you can use the so called line break with Shift + Enter. Place the cursor immediately before the preposition at the end of the line and press Shift + Enter. The text after the cursor moves to the next line to the next word. If you turn on the display hidden characters (unprintable) option on the Home tab, the icon of the Greek letter “pi” will emerge as a line break angled arrow on the end of the line. Thus we may in the future determine where we put line breaks and eventually delete it.
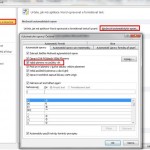
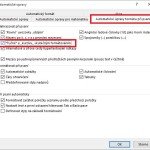
- The second procedure, the best is called nonbreaking (hard) space. This symbol, written instead of the original spaces between words by pressing Ctrl + Shift + Spacebar, permanently connects these words, never to be broken words at the end of the line – so they’re always together, even after changing font sizes. Hard space Word automatically inserts after every single letter preposition (confirmed for Czech version). This is ensured by setting AutoCorrect options. Hard space in the mode of seen printable characters recognizable as a small circle between words (like a degree).
Working procedure to replace all spaces for single-letter words (prepositions and conjunctions) is:
- open replace windows by Ctrl+H
- to field “Find” set “<(?)> ” (without quotes); where <(?)> finds single letter with a space
- to field “Replace with” set “\1^s” (without quotes); where \1 means the single letter and ^s symbol meants hard space
- press “More” button and check the field “Use wildcards”
- press “Replace all” button


27 komentáře
Snažil jsem se pomocí Wordu vysázet knihu o rozsahu 150 stran a po hromadné náhradě normálních mezer za pevné za všemi jednopísmennými předložkami obsahovaly některé řádky vizuálně příliš velké mezery. To kvůli tomu, že pevné mezery mají ve Word pevnou šířku. Začal jsem tedy experimentovat a výsledkem je následující makro, které nahradí jen normální mezery jen tam, kde by zůstala předložka na konci řádku.
Postup použití je následující:
1) Vložit makro do Wordu.
2) Nahradit všechny pevné mezery normálními.
3) Spustit makro – u 150 stránkové knihy to trvá asi 10 minut.
Kód makra:
=========
Sub vlozeniPevnychMezer()
Application.ScreenUpdating = False
Dim AscA, AscE, AscI, AscK, AscO, AscS, AscU, AscV, AscZ As Integer
AscA = Asc(“A”)
AscE = Asc(“E”)
AscI = Asc(“I”)
AscK = Asc(“K”)
AscO = Asc(“O”)
AscS = Asc(“S”)
AscU = Asc(“U”)
AscV = Asc(“V”)
AscZ = Asc(“Z”)
AscSpace = Asc(” “)
Dim doc As Document
Set doc = ActiveDocument
Dim prevWord As Range
Set prevWord = doc.Range.Words.First
Dim prevLine As Integer
prevLine = prevWord.Information(wdFirstCharacterLineNumber)
Dim currWord As Range
For Each currWord In doc.Range.Words
Dim currLine As Integer
currLine = currWord.Information(wdFirstCharacterLineNumber)
If (prevLine currLine) Then
Dim prevWordChars As Characters
Set prevWordChars = prevWord.Characters
If (prevWordChars.Count = 2) Then
If (Asc(prevWordChars.Last) = AscSpace) Then
Select Case (Asc(UCase(prevWordChars.First.Text)))
Case AscA, AscE, AscI, AscK, AscO, AscS, AscU, AscV, AscZ
prevWordChars.Last.Text = Chr$(160)
End Select
End If
End If
End If
prevLine = currLine
Set prevWord = currWord
Next
Application.ScreenUpdating = True
End Sub
Problém “nejlepšího postupu” je ten, že ona pevná mezera má fixní šířku, takže když je zvoleno zarovnání do bloku a, tak ona mezera vypadá často nepřirozeně, když je i několikanásobně menší, než mezera obyčejná. Předpokládám, že nejde udělat, aby se i její šířka přizpůsobovala?
Po nekonečném procházení anglického webu mě napadlo vyhledat to česky a ejhle…
Wow, díky moc za tenhle článek i Adamovi. Funguje to parádně! 🙂 (Jinak to makro mi přijde zbytečné. Postupem, který je zmíněný v článku a upravený Adamem to máte sotva za dvě minuty.)
Provedla jsem vše přesně podle toho tzv. fungujícího postupu pro nahrazení všech mezer za jednopísmennými slovy. Výsledkem toho je, že mám za všemi jednopísmennými předložkami a spojkami mezery dvě, přičemž problém s umístěním na konci řádku to nijak nevyřešilo. Naopak se mi utvořily mezery i za slovy, které na koncích řádků nejsou a nebyly míněny ani jako předložky či spojky (nýbrž třeba citoslovce). Co dělám špatně?
Vypadá to, jako byste zapomněla u bodu: do pole “Najít” zadat “<(?)> ” (bez uvozovek), nekonec dát mezeru nebo bod: stisknout tlačítko “Více” a zaškrtnout políčko “Použít zástupné znaky”.
Bože Vy jste genius! Použila jsem tu poslední možnost a je perfektní! Hrozně moc Vám děkuji!
Děkuji mnohokrát 🙂 Jste frajer. Odkaz na Vaše webovky šířím s radostí dál.